

Transform an old, faded, or unwanted tattoo into a completely new custom composition. Each cover-up is carefully planned around the existing tattoo, its placement, and the natural flow of the body to create a result that feels intentional rather than concealed.
A Cover-Up Transformation, Step by Step
Follow a shoulder-to-elbow cover-up through four stages: the original tattoo, stencil placement, work in progress, and the finished piece.
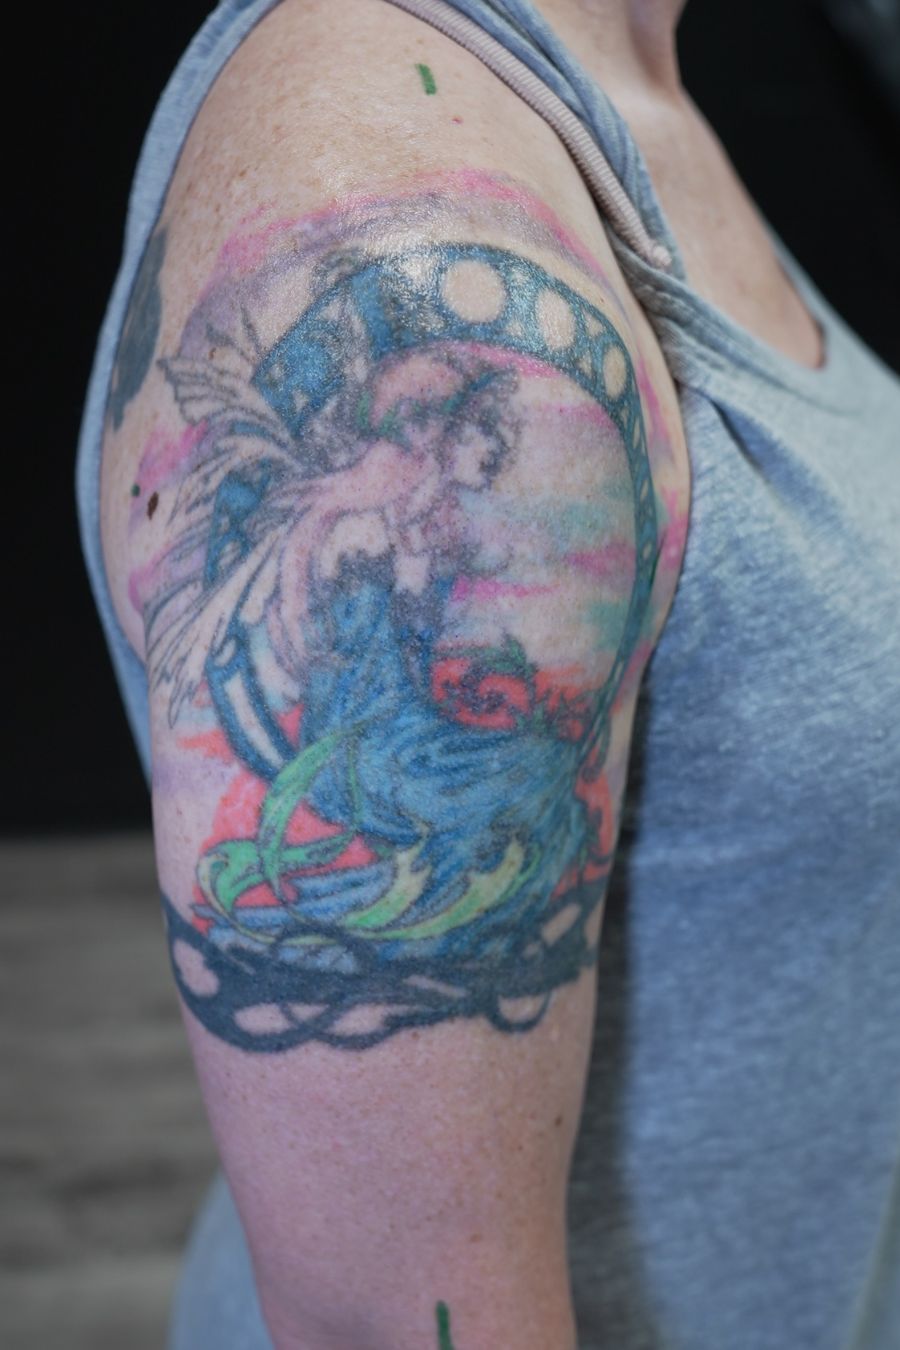
The Original Tattoo
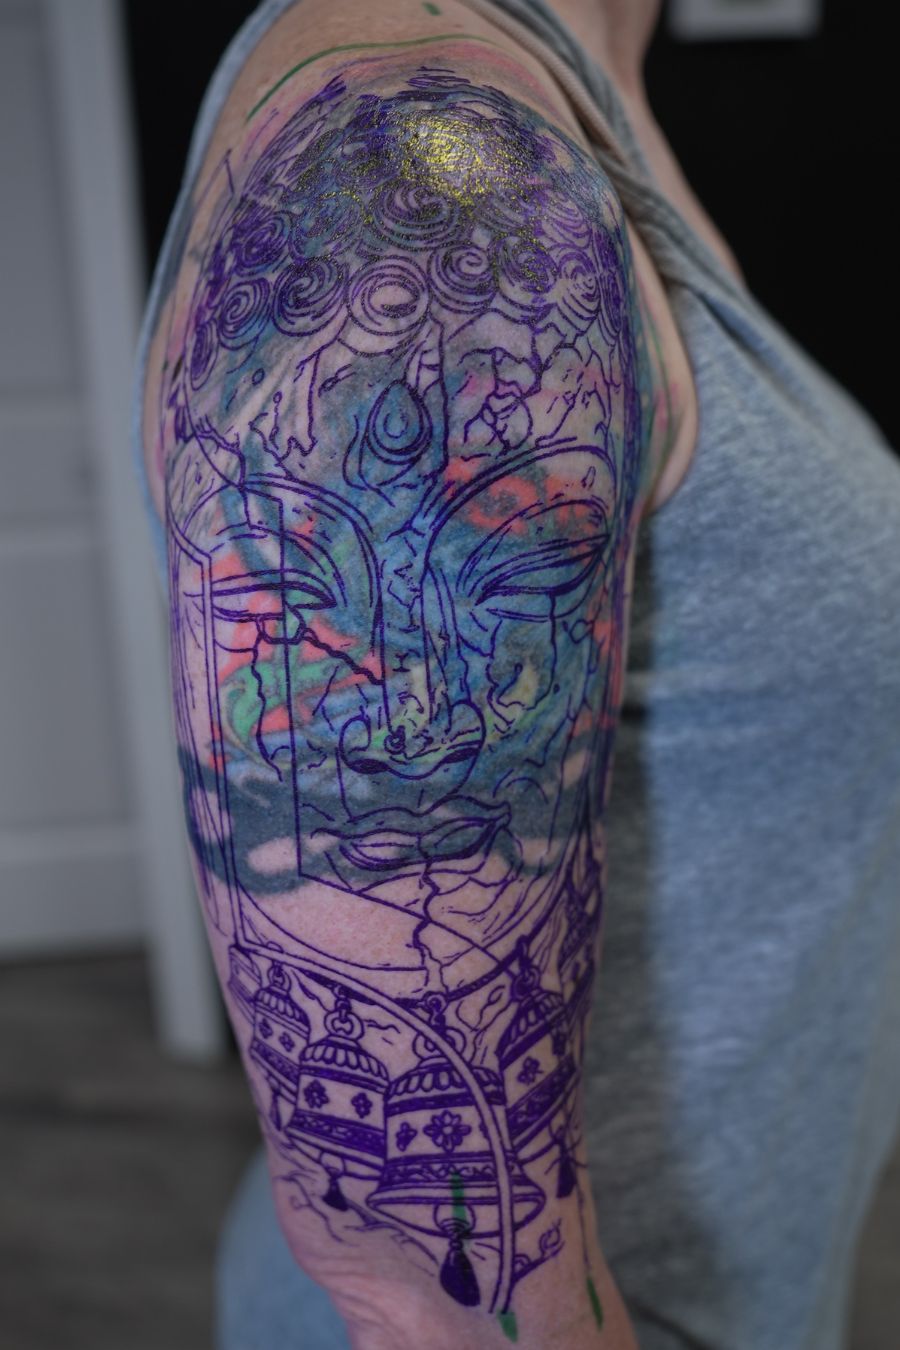
Stencil Placement
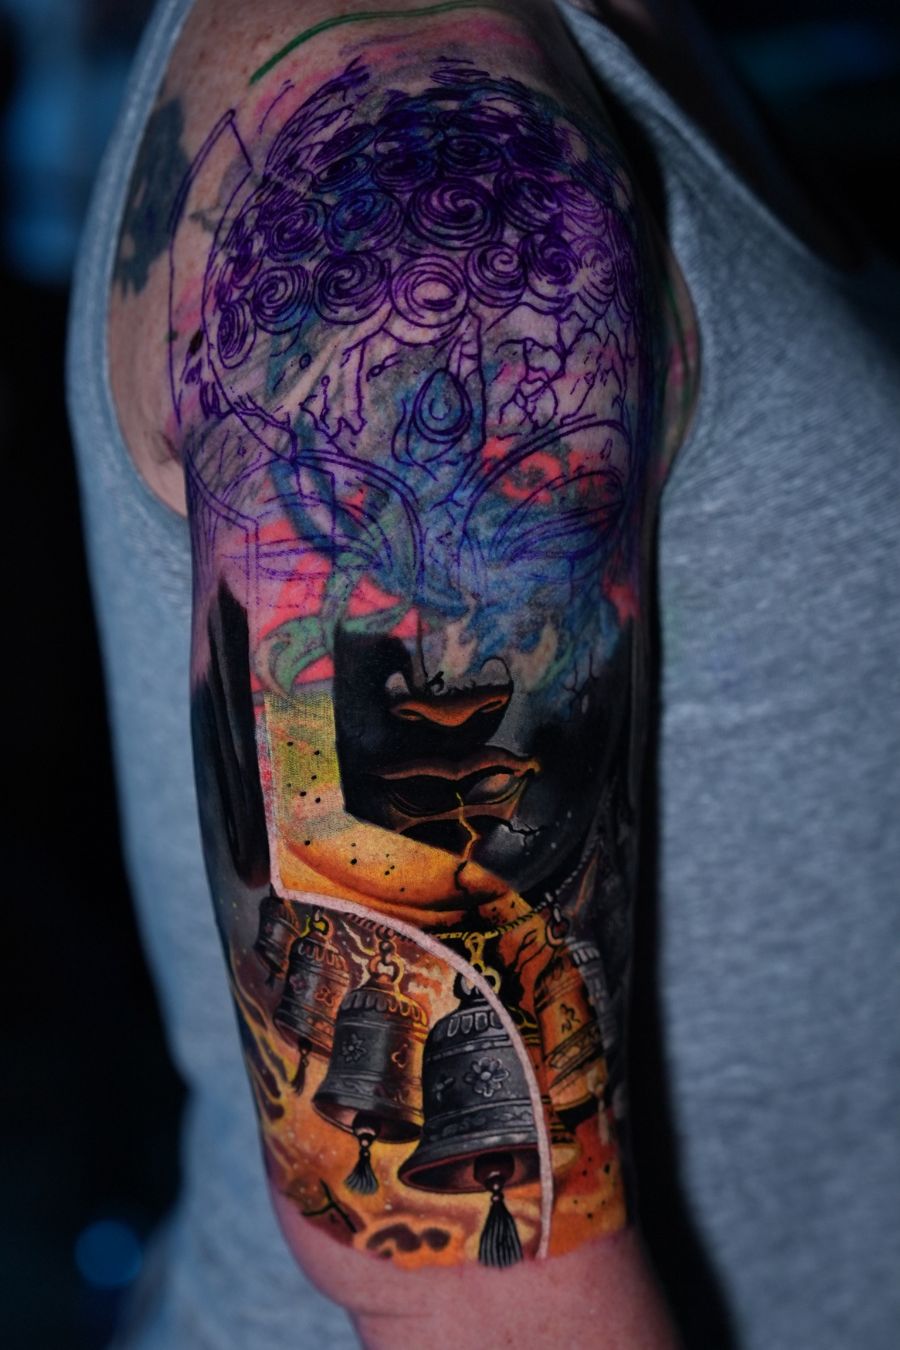
Work in Progress
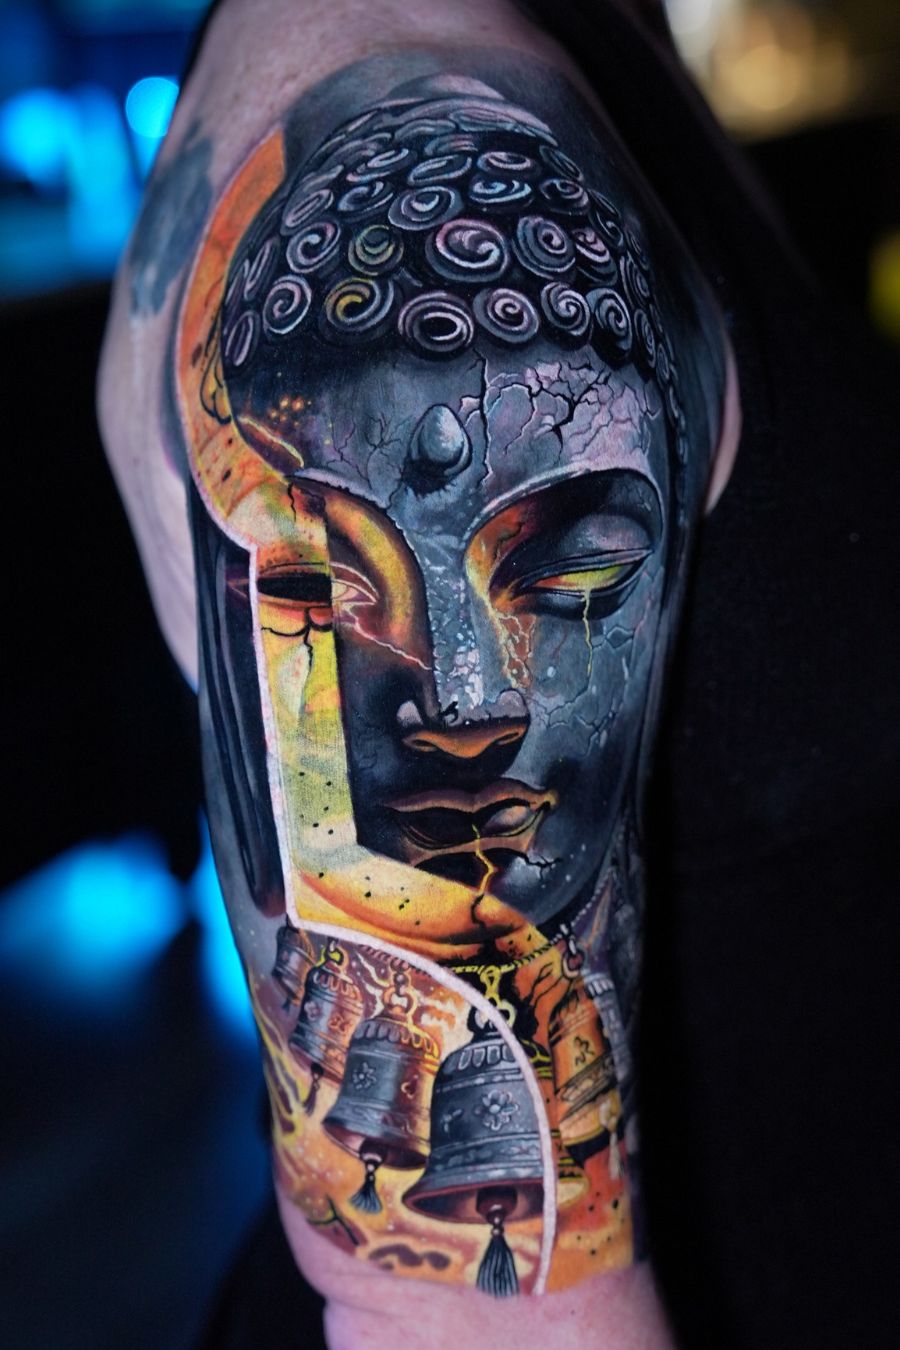
The Finished Cover-Up
What Makes a Successful Cover-Up?
Cover-Up Options for Your Existing Tattoo
Cover-Up Tattoo FAQs
Cover-up options depend on the existing tattoo’s size, ink density, colors, and placement, as well as the design you want. A clear photo helps assess what may be possible. Being flexible with the new design and its size can open up more options.
A cover-up often needs to extend beyond the original tattoo to give the new design enough room for its shapes, details, and shading. How much larger it needs to be depends on the existing tattoo and the composition being created.
The number of sessions depends on the size of the project, the complexity of the new design, and the coverage required. The shoulder-to-elbow transformation shown above was completed over two full-day sessions. Your project may require a different schedule.
Your ideas help guide the design, but the existing tattoo affects what will work. Some references may need changes in size, placement, color, or contrast to provide effective coverage. The aim is to create a tattoo you want while working with what is already there.
Start Your Cover-Up Tattoo in Kansas City
Send a clear, well-lit photo of the tattoo you want to cover, including the surrounding skin. Let me know its approximate size, where it is on your body, and what you would like to create instead. You can also include reference images to help explain your ideas.